Welcome to another amazing issue of the EtsyMom Team Newsletter! We have one quick announcement before continuing on. We're making some team changes! Come this fall, we will no longer gather at socialgo.com, the site we have been using as our private forum. We will instead have everything right here at etsymom.com! The newsletter format will be changing, the EMCA will be located right here, the Marvelous Mom will continue to be posted, and we have many more amazing opportunities coming. We're in the building stage so if you have any questions or comments, we'd love to hear them! Send an email to etsymomteam@gmail.com. And now, sit back, relax and enjoy our great content!

SPECIAL EVENTS
The Special Events Committee is in the process of planning a fun new event for all you EtsyMoms out there! This event will be for the fall season, and it's going to tap into your creative sides! Are you ready?
It's going to be the Fall Color Palette Challenge! If you've not participated in a color palette challenge before, don't miss this one! More details to come to all EtsyMom sites soon, but here's an overview of what you need to know. You create something using the colors on the fall color palette that will be provided, your creations are put up on the blog for all to see, votes are taken (1st, 2nd, and 3rd place), winners are announced, and prizes are won! Pretty simple.
Again, keep an eye out for more details on this event coming soon!
The EtsyMom Team participated in the 4th Annual Etsy "Christmas in July" (CIJ) Sale. From July 14th through the 24th, close to 80 shops joined in the fun and offered some awesome deals, and committee members promoted this event to boost the team's visibility. We loved how the dedicated CIJ EMCA worked out, and appreciate the support from that committee. Thanks to everyone for an awesome team effort!
During the last couple of months, the Special Events and Social Networking Committees have merged into what is currently the Special Events and Promotions Committee. We are still defining the roles of this new group and would ask all those who are signed up as "members" on socialgo to stay tuned for some important updates!

ETSYMOM CURATOR AWARD
We had a great Christmas in July themed EMCA. All of our treasuries really helped drive visits to participating shops.
Melanie of Modern Typography (one of our newer team members) is the grand prize winner - making 8 treasuries.
She also won the "best publicized" award with 16 unique comments on one of her treasuries.
First Runner Up
Melissa of Creative Art by ME - making 5 treasuries
Second Runners Up with 2 treasuries each:
Katie of Adelle Rose and Erin of Sassafras Saige
We had 9 participants and 24 treasuries were made.
Thank you to our sponsors and participants!
The August/September EMCA started August 15! As a reminder, here's how the EMCA works:
We are so excited to introduce the EtsyMom Curator Award - an award that will honor the dedication of one EtsyMom each month! The recipient will be the EtsyMom who helps to promote the team as a whole by curating the most EtsyMom team treasuries in a one month period! We will also be acknowledging each and every team treasury as well as the EtsyMom who curates it here, on the EtsyMom blog!
If you have not made a treasury before, and need help creating your first treasury, please let us know. We will be happy to help.
The big holiday shopping season is here, and we want to promote EtsyMom as a team to get our name out there and encourage others to buy handmade products from hard working, talented and dedicated moms. We think that a great way to start off is by encouraging all EtsyMoms to curate EtsyMom team treasuries. We have quite a few members - what a huge impact it would have on promoting EtsyMom! Many people check the treasuries often, and I know that some shop directly from them.
This is how the EMCA will work:
* Each EtsyMom who curates an EtsyMom TEAM treasury will submit a link to their treasury link here in this thread: EMCA - EtsyMom Curator Award
* Every single team treasury will get a screenshot (picture) posted to the EtsyMom Curator Award Blog as well as a thank you with a link directly to the curator’s shop.
* The EtsyMom who curates the most treasuries in a one month period will be the recipient of the EMCA, which is comprised of four parts: the winner’s shop’s EtsyMini will be posted on our team blog for one month as a thank you for helping to support the team, a special button will be made and posted on the team blog and team member's blogs, there will be a Marvelous Mom feature of them and they will also get to choose a prize from one of that month’s sponsors.
The rules:
* The sponsors for the month CANNOT be winners for that month
* The same person cannot win two awards in a row.
* In order for your treasury to count, you must use only EtsyMom items, and mention "EtsyMom" either in your treasury title or description so it’s easily identified as an EtsyMom treasury.

ETSY TIPS
by Jenny from loulou tutu
Shipping
If there is one area that I strive to improve, it’s shipping. I feel like I spend half my week going to and from the post office. Here are some great shipping tips from fellow Etsy sellers.
1. Use the shipping labels available from Paypal. You can either print out an individual order or multi-order labels. You will need to know the weight of the items being shipped before you can do this, so invest in a shipping scale.
2. You can schedule carrier pickups through usps.com or through Paypal. This will cut down on the unnecessary trips to the post office.
3. Did you know that USPS Priority boxes are FREE?! They will even deliver them to your door. You can visit their online store (www.usps.com) for more information.
4. Buy shipping supplies in bulk and stock up ahead of time. Doing so will prevent you from having to overpay for these supplies at the post office.
5. If you are shipping internationally, keep your receipt with the customs number information. It can help a little if things go awry, as you'll be able to show the buyer prof that you shipped the item.
6. The USPS isn’t always the best option, especially if you have large packages. Check out UPS and Fedex; they may offer a better shipping rate.
Good luck, and happy shipping!

TUTORIAL
by Rebecca from traveling tot shop
Back-to-School Drawstring Backpack
I thought this backpack tutorial might come in handy, as many Etsy Moms are prepping for back-to-school.This is a fun project and should take under an hour to complete. These handy backpacks can be folded up so they take up no room in a gym bag or larger school backpack and come out when needed for gym clothes or to tote a ball to practice.This is a great project for using up your fabric scraps.
Fabric: Nylon fabric (used in this example) is great because it wipes clean easily and is durable.Cotton prints or solids look great,too; just make sure to prewash cotton fabric. The backpack in this example is sized to hold a pair of gym shoes or a soccer ball.
Items needed:
• Pins
• Scissors and Rotary cutter
• Chalk
• Thread to match your fabric
• .5 yard of fabric (if fabric width is 40 inches or more)
• 2 eyelets or grommets
• Eyelet or grommet tool, I use 5/8" eyelets in this example.
• 4 yards of cording, cut into two 2 yard pieces, knot on one end
• 4 inch square of interfacing (optional)
Let’s Begin:
Set tension to high setting (I use 7.5) and presser foot should be almost on highest setting, between 3 and 4.
1) Cut two pieces of fabric 15x19.5 inches. Cut a 4 inch square from interfacing,then cut on the diagonal to create two triangles. Interfacing triangles will be used to reinforce inner bottom backpack corners.
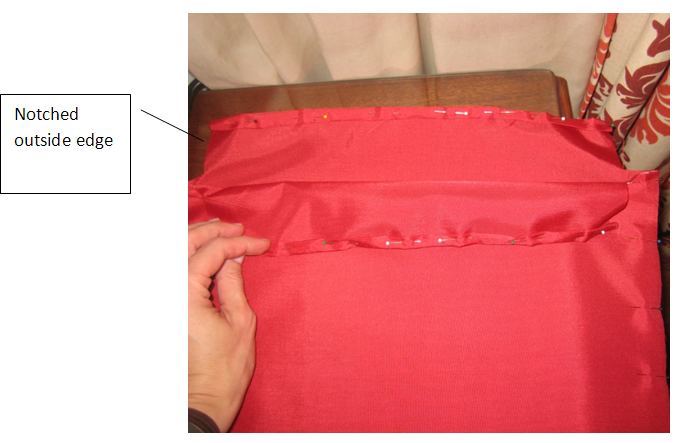
2) With right sides of fabric facing out and leaving 3 inches open at top of both sides, pin both pieces of fabric together along bottom and sides. Mark a “notch” in both sides 3/8 inches in from outside edge and 3 inches down from top. Your chalk marks will create an L shape (see drawing). Following your chalk marks, trim a notch in both top corners. You are cutting through two layers of fabric at once to ensure fabric will line up properly when sewn together. Your fabric will now look like this:

3) Fold both top edges down two 1/4 inch turns and pin as shown, sew both edges catching all three layers of fabric and removing pins as you go.
4) Fold each of the four notched outside edges in two 1/4 inch turns, pin to secure, and sew straight stitch reinforcing at start and end of stitching.
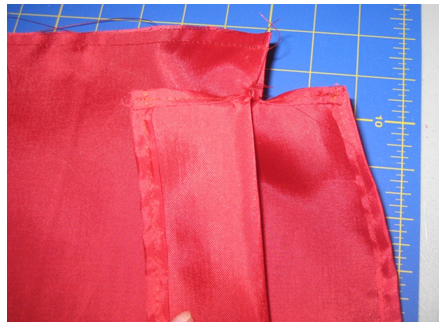
5) Next sew a 1/4 inch seam along left and right sides and the bottom of fabric, top will be open.
It will now look like this:
6) Fold both top edges down toward inside 1 inch and pin. Sew a continuous straight stitch all the way around the drawstring casing following the line of stitching you created earlier. Remove pins as you go. (Change tension to 6 and presser foot to 2 1/2 at thickest part of casing.)
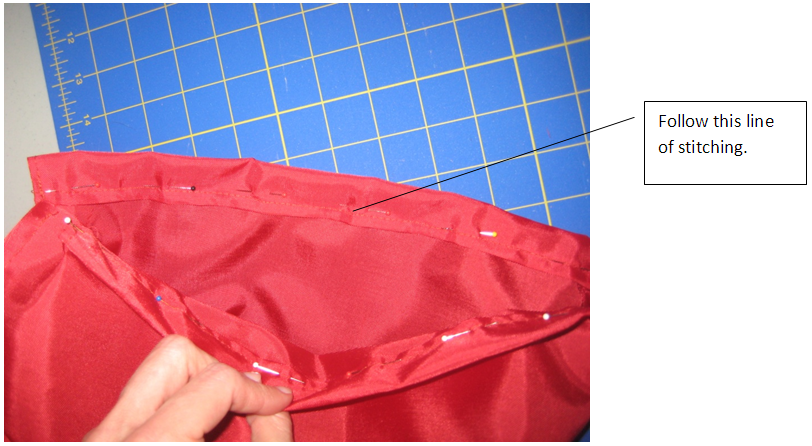
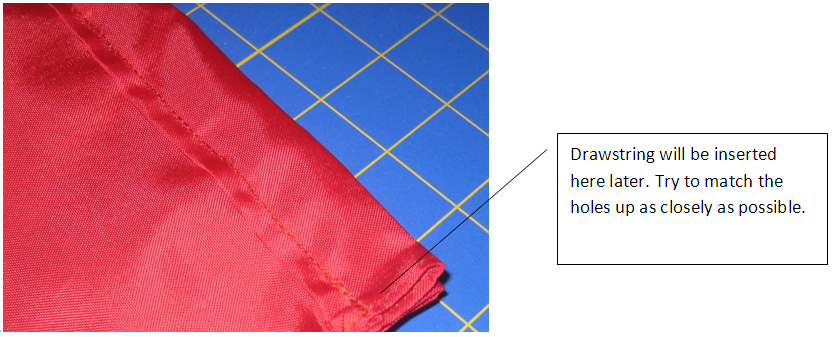
7) Turn backpack inside out. Finished drawstring casing seam looks like this.
Finishing Up:
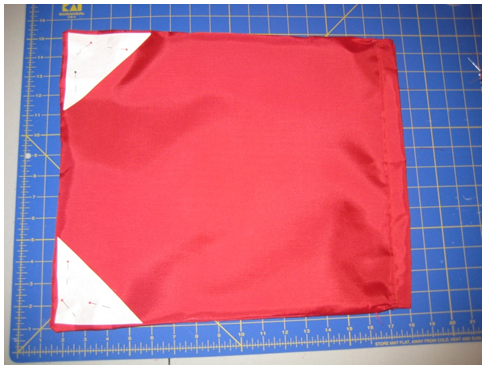
8) Did you turn your backpack inside out? Great! Press your finger along the inside edge of fabric so the seam is tight. If you used cotton fabric, iron fabric to ensure you catch the inside seam when you create a 5/8 inch seam next. Okay, now pin interfacing corners as shown on bottom corners of backpack. You will be sewing over them when you sew a 5/8 inch seam along sides and bottom, so pin them close enough to the outside edge so you will catch them in your seam.
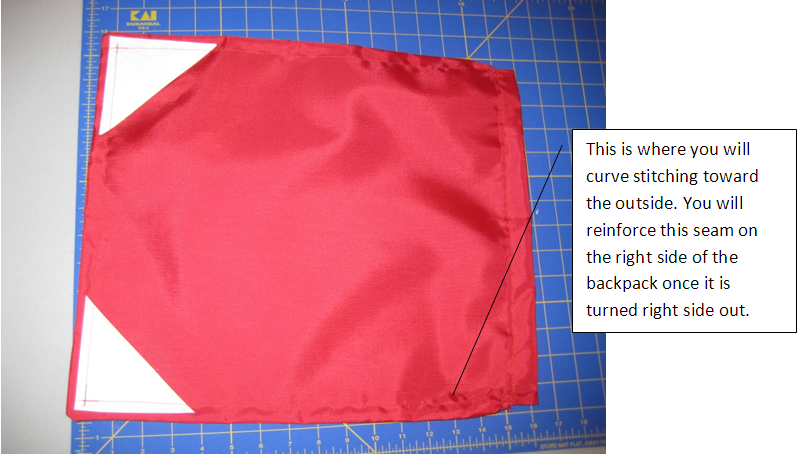
9) Sew 5/8 inch seam along bottom and sides. Softly curve your stitching outward (see below) as you come toward the casing at the top on each side, use care not to stitch over casing opening.Stop stitching and reinforce seam just before you reach casing.
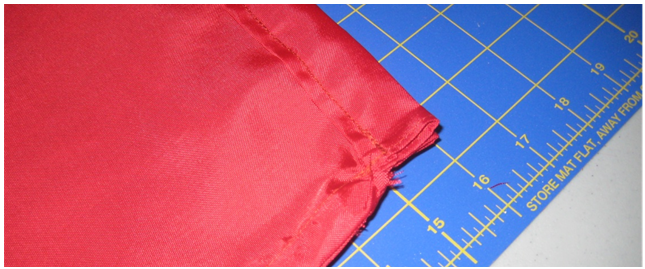
10) Now, turn backpack right side out. Open the backpack and on the seam perpendicular to the casing holes for the drawstring, use a zigzag stitch up and down for 1 inch on the seam to reinforce this seam.
11) Next, use chalk to trace a line on the edge of the interfacing on the diagonal across each corner. Sew just below this line to finish the reinforced corners. Chalk line disappears easily by gently rubbing with a towel or a damp cloth.
You are almost done!
12) Lay backpack flat. Knot one end of each piece of drawstring (it will be easier to thread through the backpack casing this way). Thread the knotted end through one hole on the left side and then out the right side and back in the other hole on the right side, bringing the drawstring out the left side of the casing next to the insertion point. You have pulled it through a full circle.Pull ends even, unknot end,and thread both cord ends through eyelet, securing ends together in a knot.Do the same thing with the other piece of cord but insert it into the casing hole on the right side of the backpack, ending on the right side.
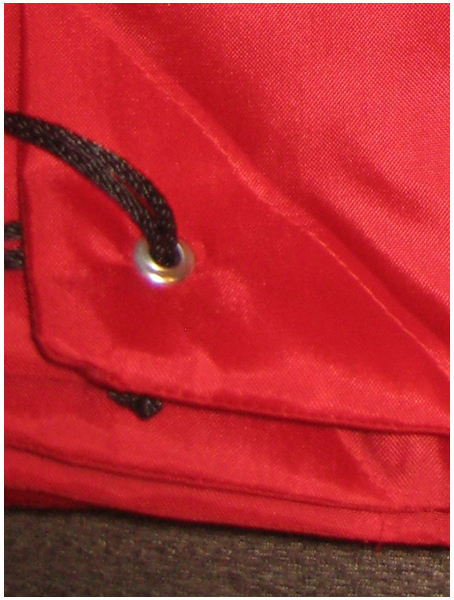
13) At bottom corners, measure in about 1 inch from the side and bottom and place a chalk mark on the same point in each corner. Using your eyelet tool, pierce the corner. I use a sharp scissor to make a tiny snip in this hole to make it easier to insert the eyelet. Insert the eyelet piece with the taller/higher mid-section and place a short eyelet piece over it. Insert the eyelet tool so the tip is poking up through the eyelet.Catch the top piece of the eyelet roundly as you come down and firmly press on the eyelet tool. You can flip your eyelet tool and press again to finish off any rough edges. This is worth practicing on a scrap of fabric if you haven’t done it before so you end up with a nice eyelet on your finished product.
14) Insert drawstring ends through corresponding eyelet and tie both ends in a knot together, secure tightly. Drawstring cord ends can be finished nicely with heat, use caution and read more online before attempting it for the first time.
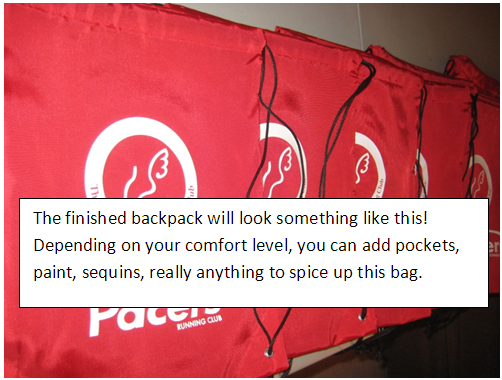
There are many ways to vary this project.If you don’t have any eyelets or grommets, or haven’t used them before, you can sew the drawstrings into the corner seams or create a small tab protruding from both corners to thread the cord through.
Have fun, and good luck as you head back to school!

FEATURED SELLER
Our featured Etsy seller for August is Holly of Holly Storm Designs.

Tell us about yourself.
My name is Holly and I am a 32-year-old WAHM, with a boy of 11, Gabriel, and a girl of 4, Emma. They are my entire world, and selling on Etsy is my sideline...
What do you create/offer in your Etsy shop?
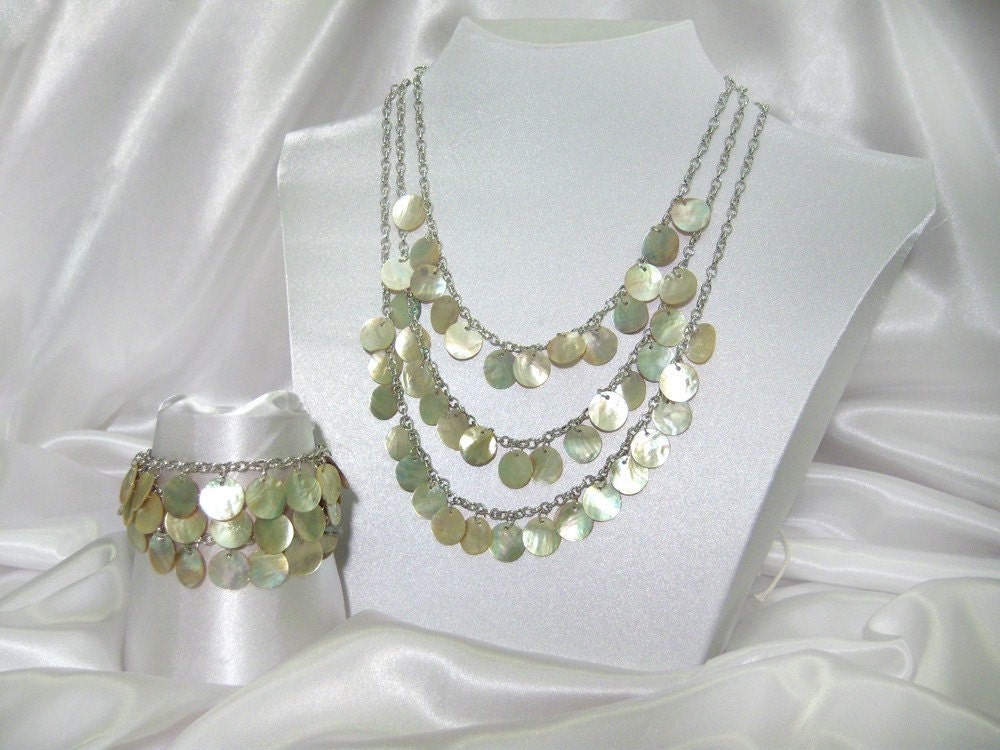
I design and create mostly mid-century vintage-inspired accessories and jewelry, with some unique clothing items thrown in.
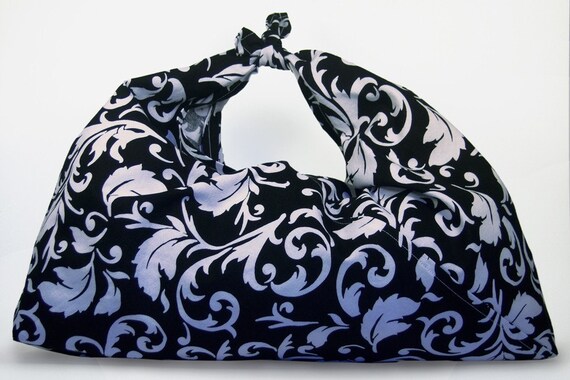
How did you get started in your line of business?
Professionally, I work in graphic design/product development. After a difficult last pregnancy and my daughter's minor health problems, I decided to leave the 9 to 5 and do freelance graphic design from home. I had also wanted to learn to sew, and I was able to throw myself into it. I was able to make clothing and accessories I liked and that were unique, without paying custom prices. Win-win! I had so many ladies asking me where I got my dress/purse, etc., that I decided to make them for sale and list them online.
Describe your creative process
When an idea strikes, I grab my sketchpad and a calculator. I'll work out an overall of the product, size, materials, and unique features visually. Then I go into detail sketching a pattern for the piece and working out sizes, pockets, folds, and construction. Then I shop for materials, and I time myself while making one to gauge if this will be a viable item; will someone pay what I need them to pay to cover materials and time, and still make a profit? If not, it's back to the drawing board.
Where to you find your inspiration?
I am a retro-loving girl, so for inspiration, I check out eBay, the Vintage Pattern Wiki, vintage pattern shops, Flickr streams, vintage blogs, movies, and more for vintage fashions, sewing pattern art, and scans from vintage magazines and books. Vintage Fashion is full of details that you won't find in anything mass-manufactured today, which is a great inspiration in itself: Remember, it’s all in the details. I love vintage, but I do have a modern side, and I like to mix retro prints with more modern or edgier items, for the girl who isn't comfortable in full retro, but just wants to add a touch to a modern ensemble.
What’s your favorite item in your shop at the moment?
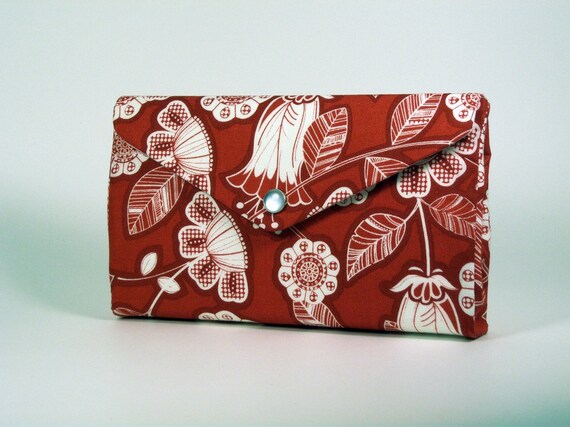
My new favorite item is not yet in my shop, so stay tuned, but I would say the Swiss Army Clutch in Red Hawaiian. It has such a fantastic 50s tropical vibe, that it's perfect for this summer's wardrobe.
How do you promote your work?
I have fallen off of the promotion wagon this busy summer, but once I get back into the swing of things, I'll promote regularly using the various social media, through Etsy Showcase spots, and through blog features like this; periodically offering discounts or giveaways for extra exposure during key retail periods.
What’s one of the most important lessons you’ve learned since starting your Etsy shop?
I've learned that promotion is really a full-time job. I have seen the great results from a full-on well-thought-out campaign, and the lackluster sales when you let yourself take a break from it (like this summer!). Any business that takes off without a lot of work is a fluke, and likely will not last. Be patient. The time you invest will pay off!
What advice would you give to someone starting out?
1. Do something that you really love. Almost always , if you are just “meh” about doing a product but can make money from it, you will eventually hate doing it anyway and sputter out. On the other side, if you love making hair do-dads more than anything in the world, but have to price them below cost just to compete in the hair do-dad market, you will eventually go broke. Find a balance. Find a fun-to-make and unique product that will return not only your monetary investment, but also pay you for your time and and allow you to make a profit besides. Hint: Just being paid for your time is not profit.
2. Do your homework.
Now that you know what you completely love making, do your homework. Find the cost of the materials of your item; don't forget to add in thread or interfacing. Add to this the cost of packaging materials like tissue paper, box, and even strapping tape. You can charge an hourly rate and add up your time or set a base fee for making. This will roughly be your wholesale. Double that for retail. Will it sell for this price? Who else is selling a comparable item and how much are they charging? Are there a lot of comparable items out there for sale? Maybe the market is over-saturated already? Be prepared to start over and don't give up!
What are your other sites (facebook, twitter, blog, etc.)?
Etsy: www.HollyStormDesigns.com
Facebook: www.facebook.com/HollyStormDesigns
Twitter: www.twitter.com/HollyStormEtsy

Have you noticed a surge in EtsyMom shops out there? We’ve had the pleasure of adding these awesome shops to our member list from July 17 to August 16. Please stop by their shops, profiles, and personal pages and welcome them to the team!
KristinsKeepsakes * Stacey * GitanaMama * daniellevmt * cali4niachef * MedBling * hellojalapeno * craftmomof3 * Jumpin In Puddles * Indigowings * Love On Wings * Above and Beyond Boutique * jewelsmc * boygirlboygirldesign * Tuturocks * apeled * KurrzKraftz * MadeJustforEwe * rememorydesigns * KnottyNotions * dirttrackdate * HiddenGrins * LilyBellasBoutique * jmasciandaro * alaApron * Domestic Goddess * Amy * Ali * heywagners * MonkeyMama * Claudine * joycejanelle * SmiLeaGainCreations * Mel * RedLetterInk * earthy * Andi * baker and the bird * stitchesxstones * sewintricate * lorisstylinghairstuf * jillmccp * loudwaterfallphoto * sewmanykisses

The site we currently use for our private members area is having some technical difficulties, so we’re not able to pull birthdays at this time. We’re hoping it will be fixed soon! So if your birthday falls between August 17 and September 16, please consider this our warmest birthday wishes on your special day.

And that's it for another great edition of the EtsyMom Team newsletter. As always, we hope that you found it informative and enjoyable. There are a lot of exciting changes headed our way and we hope that you will let us know how you feel about them. Drop us an email at etsymomteam@gmail.com or just leave a comment on the blog. We love to hear your feedback. Enjoy the next month as the kids head back to school - see you in September!
Missie, Heather and the rest of the Newsletter Crew
